Business mRDC
Deposit checks for your business anytime, anywhere.
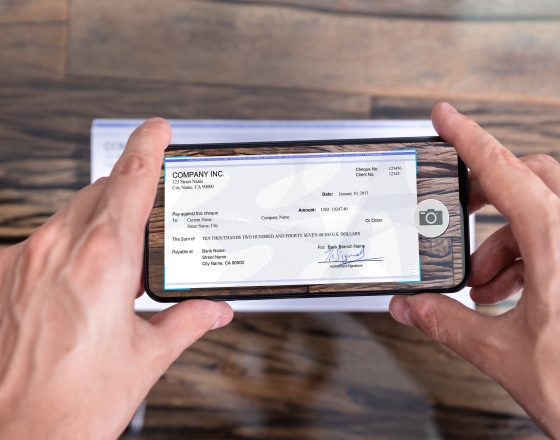
Mobile Deposit for Business (mRDC) lets you deposit checks directly from a mobile device or smartphone, no matter where you are. That versatility improves your cash flow, plus it saves money and fuel getting to and from the bank. It also lets you and your employees stay focused on your business, whenever and wherever it happens.
The above is an interactive video player referencing product info that can be found on this webpage.
Do you have questions or would you like to sign-up for mRDC?
Getting Started with the MVB mRDC App
-
Logging in to the Mobile App
Use your provided username, temporary password (if applicable), and company name when logging in to the app. Remember that closing the app will automatically log out your profile.
- Open the mRDC application. On the login page, complete the Username, case-sensitive Password, and Company fields.
- If you are logging for the first time, the system may prompt you to change your password. Enter the temporary password in the Current Password field.
- Choose a new password and enter the same sequence of characters in the New Password and Confirm Password fields. Passwords expire every 90 days and are case-sensitive. Use the following guidelines when creating a new password:
- At least 1 uppercase letter
- At least 1 lowercase letter
- At least 1 number
- 8-15 characters in length
- Select Next to continue
-
Security Questions
You may be asked to designate security questions for your profile. Security questions are an extra precaution to ensure your login credentials are secure. The following activity could be considered uncharacteristic account behavior and trigger security questions to be answered:
- If you are new to the app and have never logged in before.
- If your login credentials are used on a different mobile device than the first device used.
- If you have not used the app for an extended period of time.
Select Next to begin selecting the security questions you may be asked to answer at a future date.
- The app will prompt you to select and register your answers to three questions. From the drop-down lists, select which questions to answer and provide an answer to each in the fields provided. Answers are not case sensitive.
- Once all your questions are answered, select Next to continue.
- The app will ask you to read and confirm your answers. Select Next to continue.
NOTE: Upon logging in, you may be asked two of the three security questions. Answers to security questions are not case-sensitive. Answer the security questions and select Next to continue to the home page.
-
Making a Deposit
- Log in to the app. From the home page, select Deposit to create a new deposit. Only one check item can be processed per deposit.
- The deposit page appears. Use the Select an Account drop-down menu to specify a deposit account.
- Select Next to access the Submit Deposit page where you may enter additional information such as apartment number or the reason for the deposit in the Tran Data fields. The entry in the Transaction Number field must be unique. Duplicate transaction numbers will result in an error.
- Select the Enter Amount field to display the number menu. Specify the amount of the check you wish to deposit. Select Done.
- From the Deposit page, select the Check Front option. The camera functionality on your mobile device will start. Take a picture of the front side of the check. Use the following guidelines to ensure your picture will be captured and read correctly:
- Sufficient lighting is available.
- All edges of the check are visible in the picture.
- Place the check in front of a dark background.
- Avoid blurry images.
- Once you have your photo, select Accept to continue
- From the Deposit page, select the Check Back option. Use the same guidelines for a good image of the back of the check item. Select Next.
- The Submit Deposit screen appears. Select the Associate Deposit with Customer option to specify a customer for this deposit.
- Only existing customer records may be selected when you choose the Associate Deposit with Customer option. New customer records cannot be created in the mRDC app.
- Alternatively, you may wish to skip associating this deposit with a customer and select Submit Deposit.
- On the Customers screen, customers may be listed based on the routing and account information on the check image. Select a customer or use the Search bar for to look a different customer than those listed. The following filters are available for a search. Once you have located the correct customer, select that customer to be associated with the deposit.
- Customer Name: Enter one or more characters to search by name.
- Customer Number: Enter the full and exact number assigned to your customer. This filter is not for a dynamic search and differs from the SmartPay Business search filters.
- Account Number: Enter the last four digits of the account number associated with the customer.
- From the Submit Deposit page, you have the option to remove the customer you selected and search for another. When ready, select Submit Deposit.
- A message appears stating that the deposit was successfully submitted for processing. Select OK to finish.
-
Viewing Results
- To view the results of your deposit, select Review from the home page of the mobile application.
- The Review page appears. Select which deposit you wish to view.
- A green check next to an item indicates it was submitted.
- A red-circled X next to an item indicates it was not deposited (rejected).
- The Details page for the deposit appears, with the Location, Transaction ID, Date, deposit Status, and Amount. You may choose to view a larger version of the check image by selecting the image.
-
Transaction Status Summary
Upon logging in to Online Banking, choosing RDC, and the SmartPay Business Application loading, the Dashboard page appears with the Current Transaction Summary. This page shows the status of all transactions within the past 60 days.
NOTE: Clicking on any one status from the Current Transaction Summary will automatically generate a report for all transactions within the status for the current day.
The following table lists the potential status of any one transaction within the system.

-
Working with Deposits
You may need to void or edit a transaction submitted for deposit. This can only be done when a deposit is in the Approved status, displayed in the Current Transaction Summary on the Dashboard page once you log in. An approved transaction will move to the Processed status at the end of the closing day for your financial institution.
-
Voiding a Transaction
- Log in to Online Banking and choose the RDC icon. This will load the SmartPay Business Application and the Current Transaction Summary page will appear.
- Click the Approved link to view transactions not yet processed.
- A report with all Approved status transactions appears. Notice the indication, Approved, in the bottom half of the page under the Status column. Select the View icon to the left of the transaction you want to void.
- The Transaction Details page appears. Select the Actions drop-down menu.
- Click Void
- The system will ask you to confirm voiding the transaction. Select Void.
- The transaction will be voided and appear in a Voided status on the Current Transaction Summary page until it is resolved. Resolving a transaction means indicating a reason why the transaction was voided for communication and auditing purposes. Select Actions to enter a reason why the transaction was voided.
- Enter a reason as to why the transaction is resolved. For example, the transaction was deposited in the wrong account. Click Resolve. This transaction will now appear under the Resolved status.
-
Editing a Transaction Amount
You may need to edit an amount if a transaction has had the wrong amount keyed in when the deposit was made. A transaction amount can only be edited when in the Approved status.
- From the Transaction Details page, select the Edit icon next to the transaction amount.
- The Sale amount will become an editable field. Enter a new amount and a reason for changing the amount. Click the green checkmark icon to save the new amount.
-
Editing an Effective Date for a Transaction
Some checks may have specific instructions about depositing, including a specific effective date. Other checks may need an effective date pushed back if the deposit was made ahead of time. Use the following steps to change the effective date of a deposit item.
- Log in to Online Banking and choose the RDC icon. This will load the SmartPay Business Application. The Current Transaction Summary page will display.
- Select the Approved status link to view transactions not yet processed.
- A report with all Approved transactions appears. Select the View link to the left of the transaction you wish to change.
- From the Transactions Details page, select the Edit icon next to the Effective Date field.
- The Effective Date field will become an editable field. A calendar option appears for date selection, or you may type a date in MM/DD/YYYY format. Enter a new date and the reason for changing the effective date. Select the green checkmark icon to save the new date.
-
Reporting
In addition to the Current Transaction Summary and the Transaction Details pages, SmartPay Business has several reports available with specific information about your transactions. It also features a report builder that allows you to customize the information displayed.
For a complete guide on using the report utility, please see the User Reports Handbook, made available through your financial institution.